
How To Get Customer Emails Into Aweber Automatically


If you're selling digital products online, you need more than a pretty way to deliver your content. You need an easy way to boost conversions, maximize customer value, and run your business without worrying about technology.
Discover how our Conversion-Driven Checkout Software can increase your sales by 30% or more with lightning-fast, customizable features
Explore Our Checkout SolutionUsing Aweber? Here's the 6 steps you need to take to get your customer's email address into your Aweber account.
Step #1: Become a SamCart Customer
The truth is, it's pretty tough to get your customer's emails into any auto-responder service like Aweber if you're using a shopping cart online. Clickbank doesn't even give you your customer's emails. 1ShoppingCart makes you use their email service instead of the one you already like. Paypal doesn't give you an easy way to contact your customers after they purchase, unless you ask them to opt-in again, which will most likely never happen. And the list goes on... The simple solution? Let SamCart do all the heavy lifting for you, and join the family today.
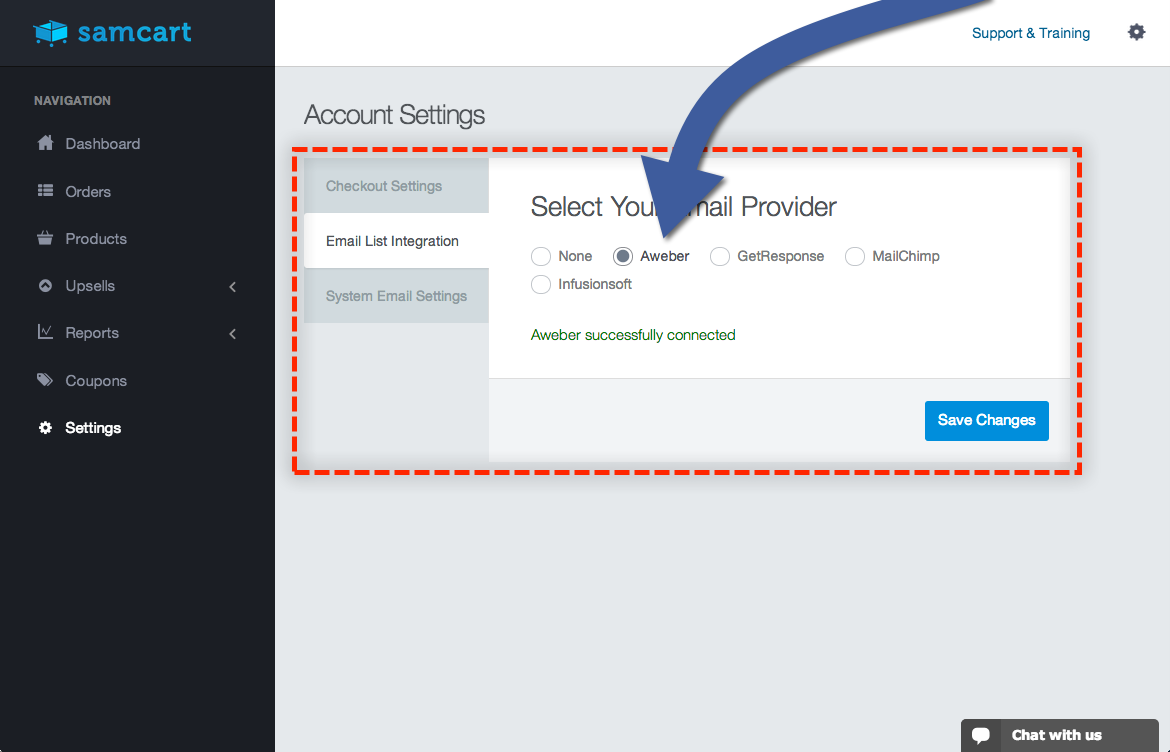
Step #2: Connect SamCart to Aweber
Once you're inside your SamCart account, the process is super simple for sending your customer's data into your Aweber account. First, visit the "Settings" tab and click on the "Email List Integration" tab. Then select "Aweber," just like you see in the image...
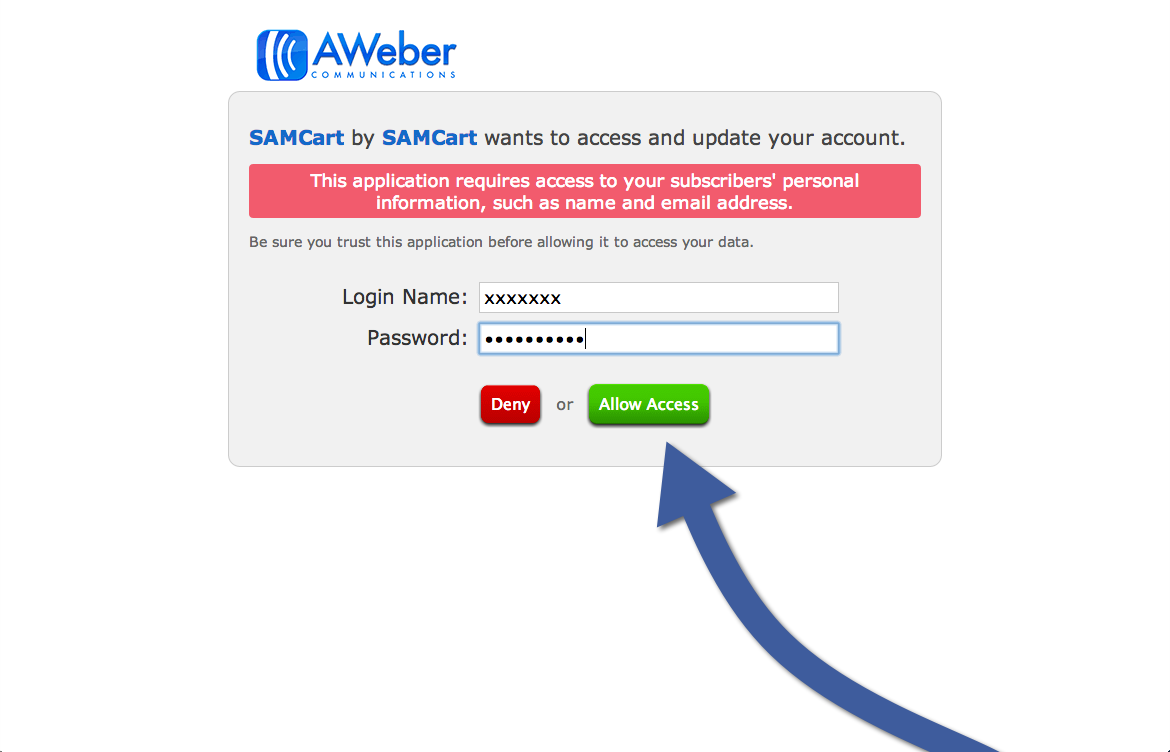
Step #3: Allow Aweber to Make the Connection
As soon as you select Aweber, SamCart will connect to your Aweber account, which should bring up the Aweber permission pop-up, where you just need to "Allow Access" to begin the syncing process.
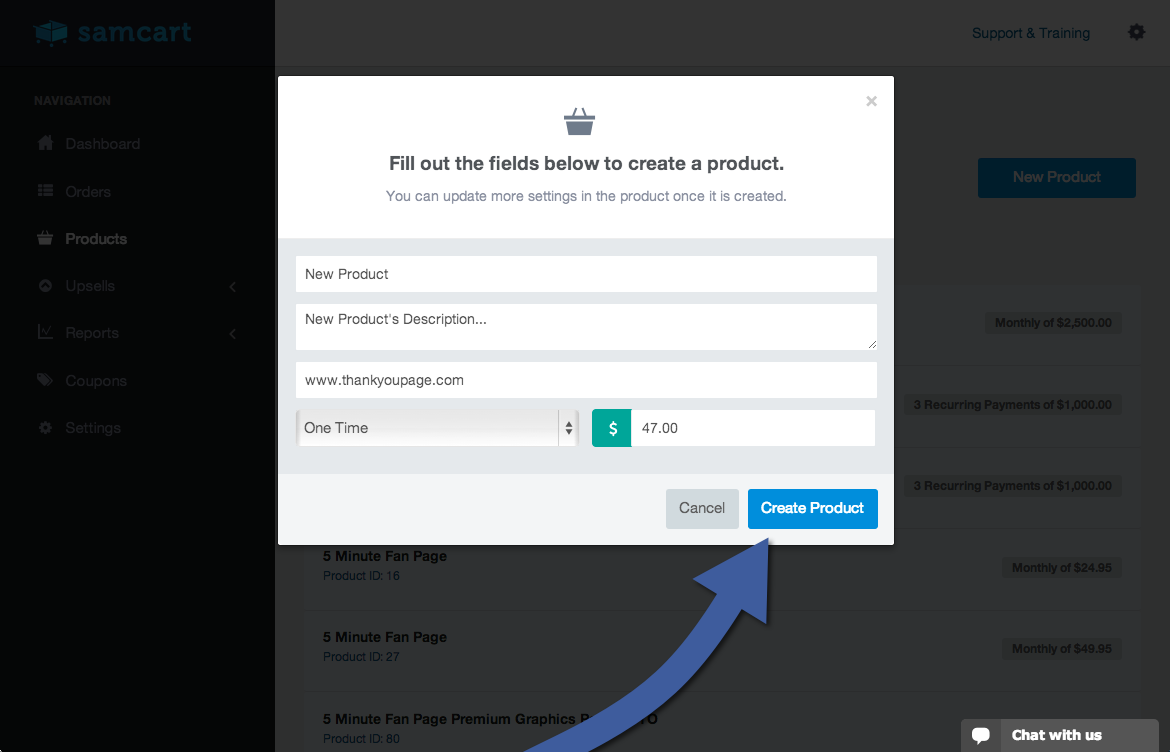
Step 4: Create A Product in SamCart
After your two accounts are connected, go to your SamCart account and create a new product. You can do that by selecting the "Products" page and clicking on the "New Product" button at the top right. Fill out your product details and click on "Create Product" to finish the process.
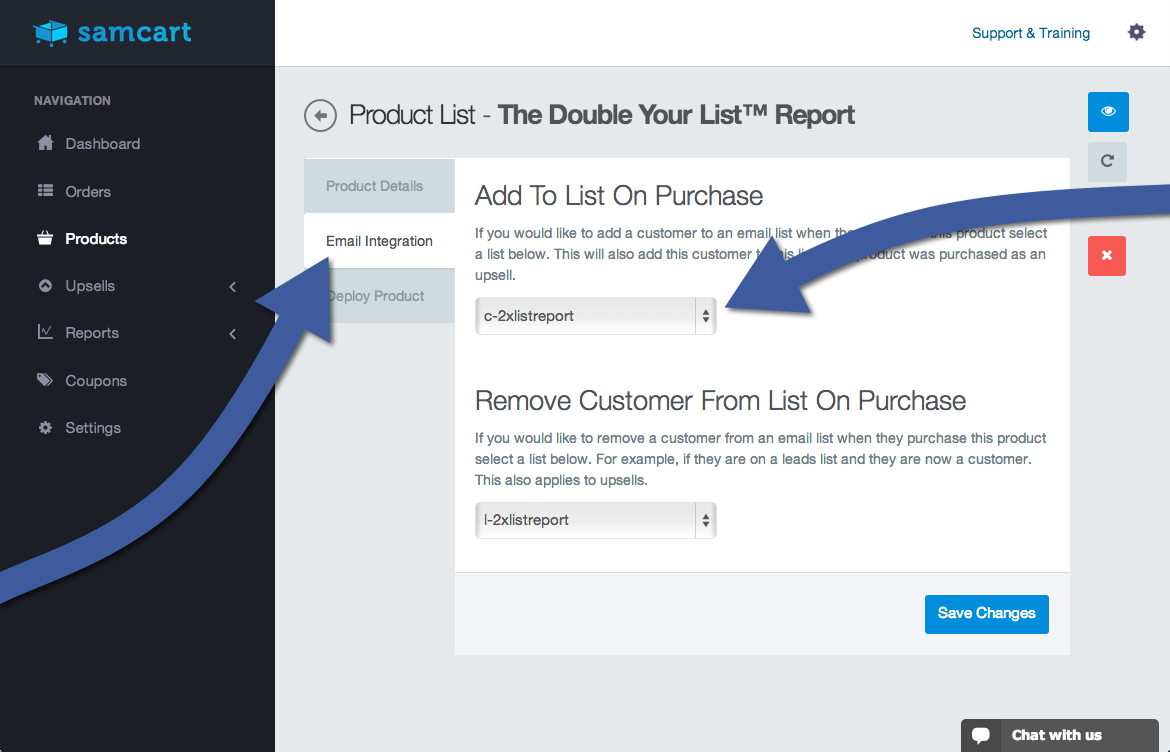
Step 5: Decide Which Aweber List to Send Customers To
Once your product is created, visit the "Email Integration" tab inside the Product Details section, which you will now see 2 drop-down menus. (One for adding customers to a specific list, and one for removing customers from a specific list) For customers who buy this specific product, select the Aweber list you'd like to add them remove and/or remove them from. Then click "Save Changes."
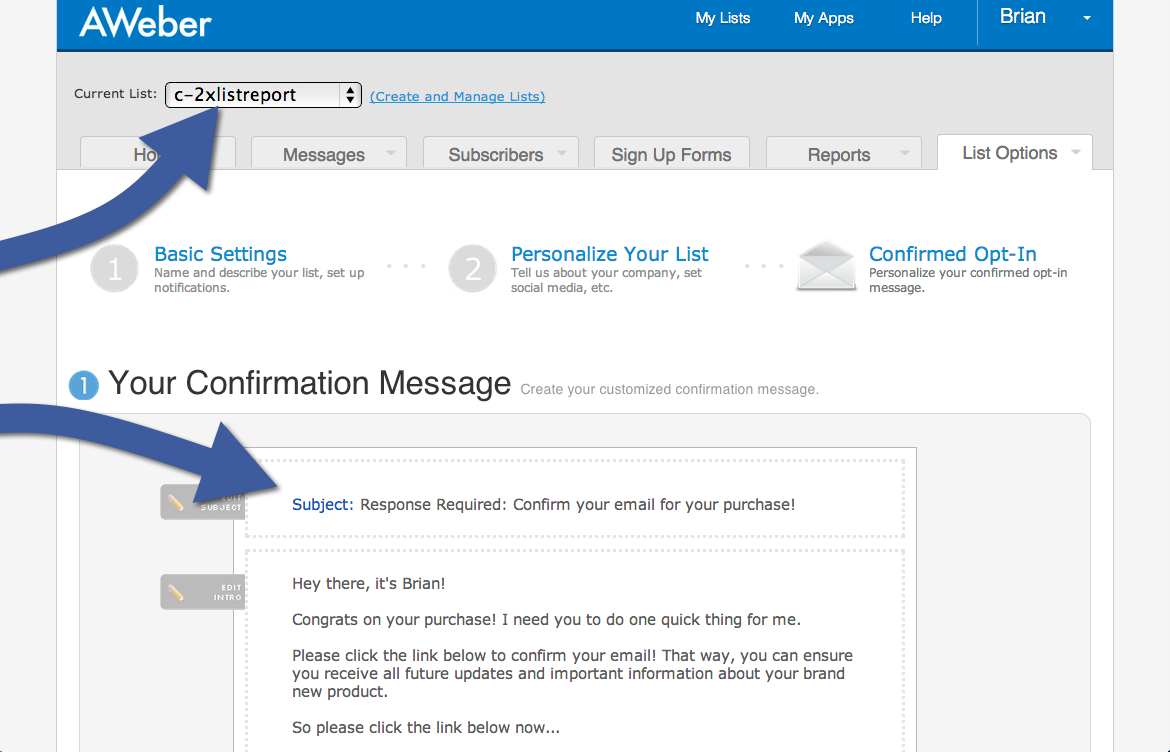
Step 6: Customize Your 'Confirmation Message'
Remember to go back to Aweber and customize the "Confirmation Message" for the list you're adding customers to. Because we connect via Aweber's API, the emails added to the new list will be asked to Confirm beforehand.
Step 7: Start Selling Your Product!
The final step is the fun part: go sell more products! Now that you're collecting the emails of every customer you get, you can continue to build the relationship with them via email or send them other offers for products they might also like. This one simple feature should allow you to significantly increase your sales by being able to contact your customers again and again.
Try SamCart Free Today
Open your Samcart account today, and take advantage of this brand new tool, while also getting instant access to all of SamCart’s other conversion boosting features.
Head over to SamCart.com to start your 14-day free trial now! And see why thousands of other business owners are switching to SamCart.


